Schwabenmax® Serviceseiten |
Schwabenmax® Serviceseiten |
| Einbauanleitung Kurzhubgasgriff KHG D2.0 Gruppen |
|
The installation instructions are in German and English (blue). For translation into other languages, we recommend the : Translated with DeepL
Einbauanleitung Kurzhubgasgriff passend für D2.0 Gruppen Gehen Sie bitte genau nach dieser Einbauanleitung vor. Verwenden Sie nur von
uns angelieferte Teile, Gasgriffklammer und bearbeite Griffschale Dieser muß von alleine in die Ausgangsposition zurückdrehen. Es darf kein Kratzen oder Schleifen auftreten.
Gefahrenhinweis: das Fahrzeug spontaner auf Gasgriffbewegungen reagiert. Fahren Sie mit gebotener Vorsicht bis Sie sich an die neuen Umstände gewöhnt haben! Sollten sie Fragen oder Probleme beim Einbau haben kontaktieren sie uns bitte unter: E Mail: KHG-Einbaufragen ________________________________________________________________________________
Fitting
instructions for short-stroke throttle grip suitable for D2.0 Groups
|
|
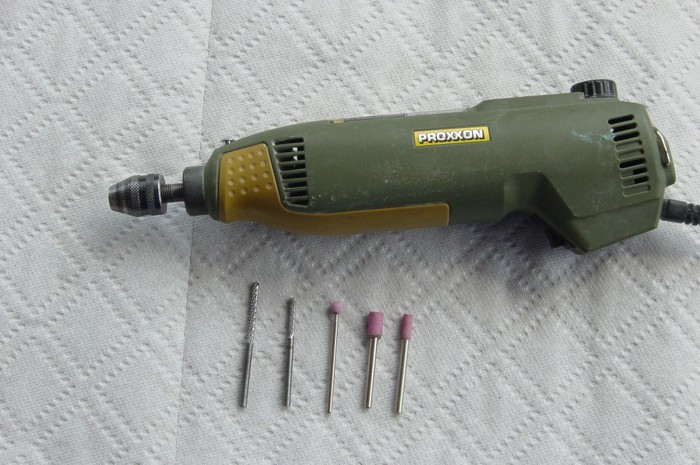
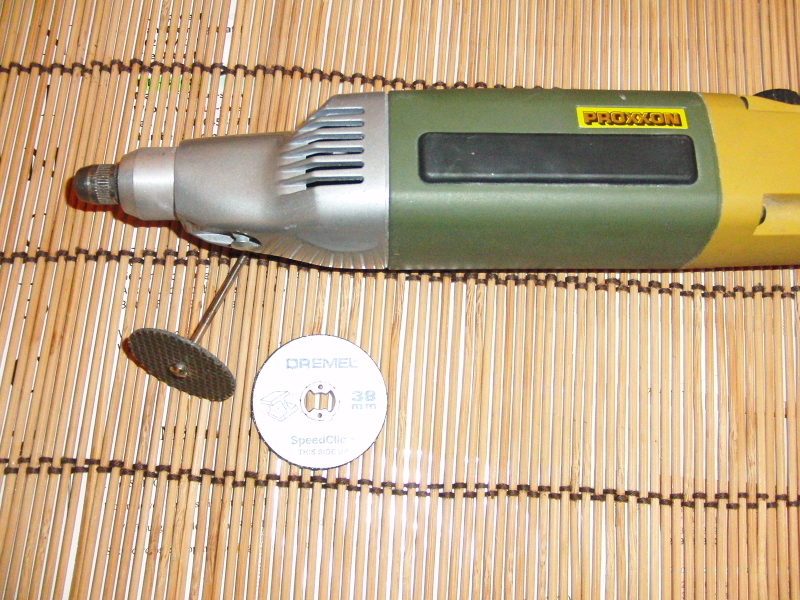
Zur Montage wird folgendes Werkzeug benötigt:
1 x Dremel / Proxxon usw. Schleifer mit
Frässtift und Säge oder Trennscheibe
Alternativ geht auch eine kleine Handsäge.
The following tools are required for assembly: Lieferumfang/deliverycontent Gasgriff Adapter/throttle grip adapter |
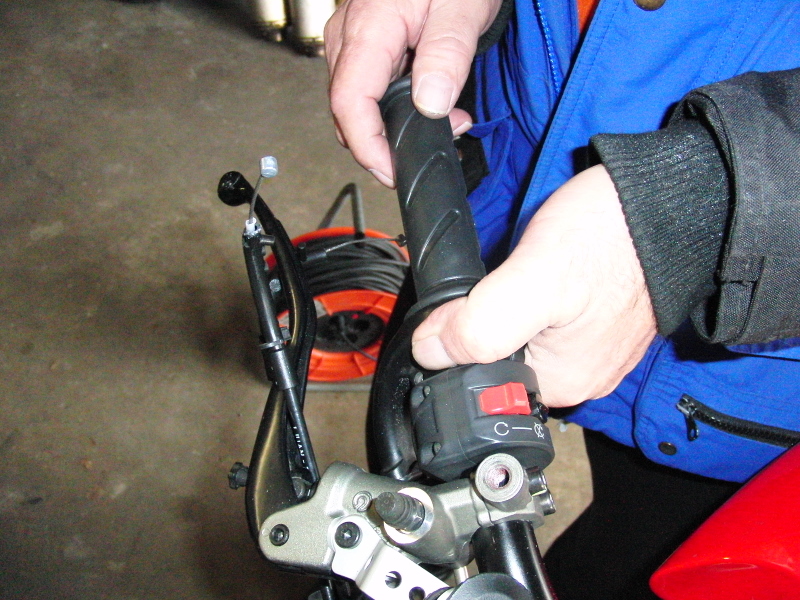
| Montageanleitung: Stellen sie ihr Fahrzeug sicher auf dem Seiten - oder Hauptständer auf . Demontieren sie die rechte Griffarmatur / Gasgriffgehäuse komplett . Zur passenden Bearbeitung des Gasgriffgehäuses benötigen sie ein Schleifwerkzeug wie einen Dremel, Proxon , oder ähnliches. Weiterhin wird benötigt: 1 Frässtift (für grobe Arbeiten ) und mindestens ein kleiner Schleifstein für den Feinschliff.
Mounting
instructions:
|
|
|
1. Gasgriffschale aufschrauben, Griff und Griffschale demontieren.
2. bei Modell Streetfigther, Scheinwerfer unten Schrauben lösen, den Scheinwerfer
mit leichtem Druck
nach oben aushängen.
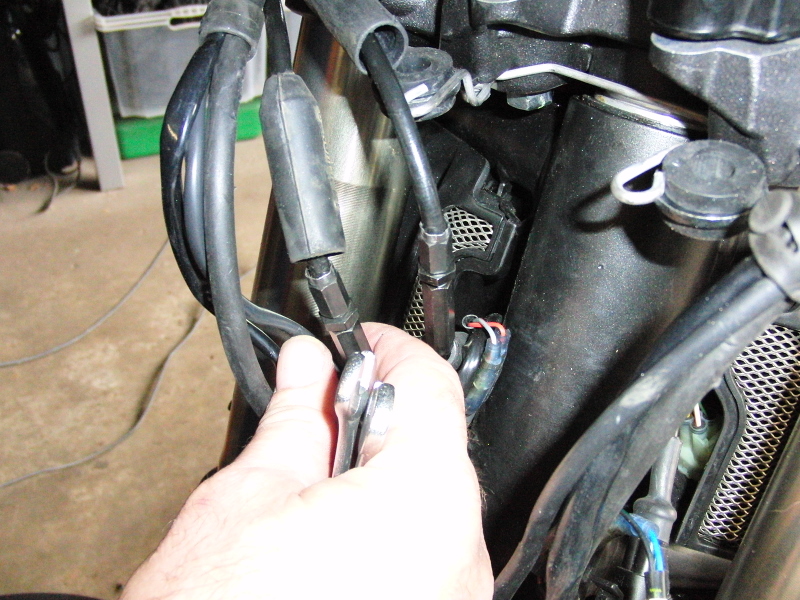
3. Beide Gaszüge haben hinter dem Scheinwerfer unter einer Gummihülle die Einstellschrauben der Gaszüge. Die Hülle abziehen, mit 1 x M10 und M8 Gabelschlüssel die Stellschrauben öffnen und auf Maximum eindrehen so das beide Züge länger werden.
1. unscrew the throttle grip shell, remove the grip and
grip shell.
2. on Streetfigther model, loosen headlight bottom screws, unhook headlight with slight upward pressure. 3. both throttle cables have the throttle cable adjustment screws under a rubber cover behind the headlight. the throttle cable adjustment screws. Pull off the cover, open the adjusting screws with 1 x M10 and M8 open-ended spanner and tighten to maximum so that both cables are longer.
|
 |
|
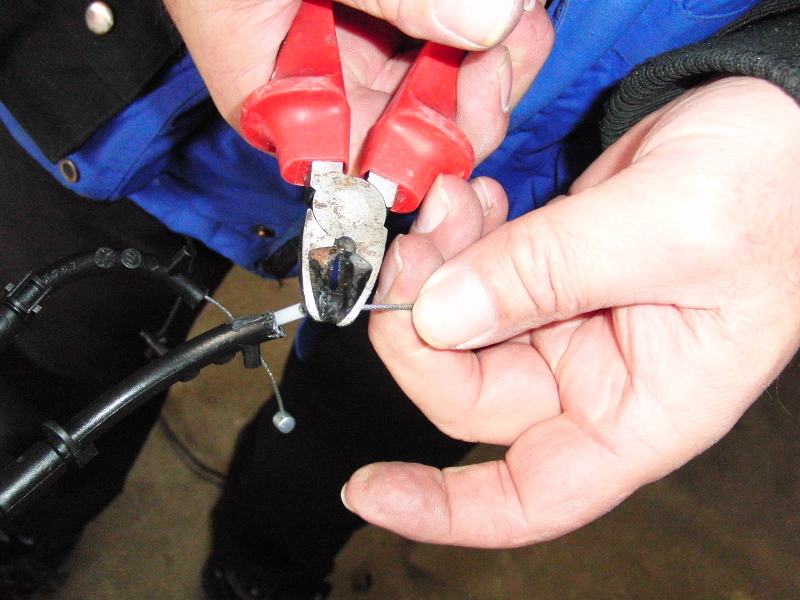
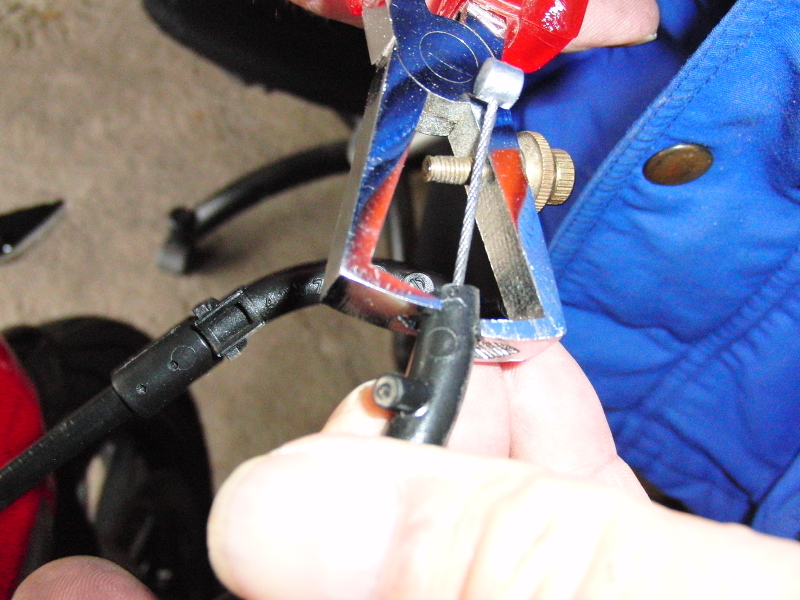
4. Der Gaszug ( öffnen ) muss in den meisten Fällen im vorderen Bereich der Kunststoff Ummantelung um ca. 2-3 mm gekürzt werden
Wir haben verschiedene Varianten getestet: Mit einer Abisolierzange wäre es einfach machbar sofern die Zange scharf ist und einen Abstandshalter besitzt so das der Gaszug nicht beschädigt wird.
4. the throttle cable ( open ) must be shortened in most cases in the front area of the plastic sheathing by
approx. 2-3 mm. throttle cable is not damaged.
|
 |
|
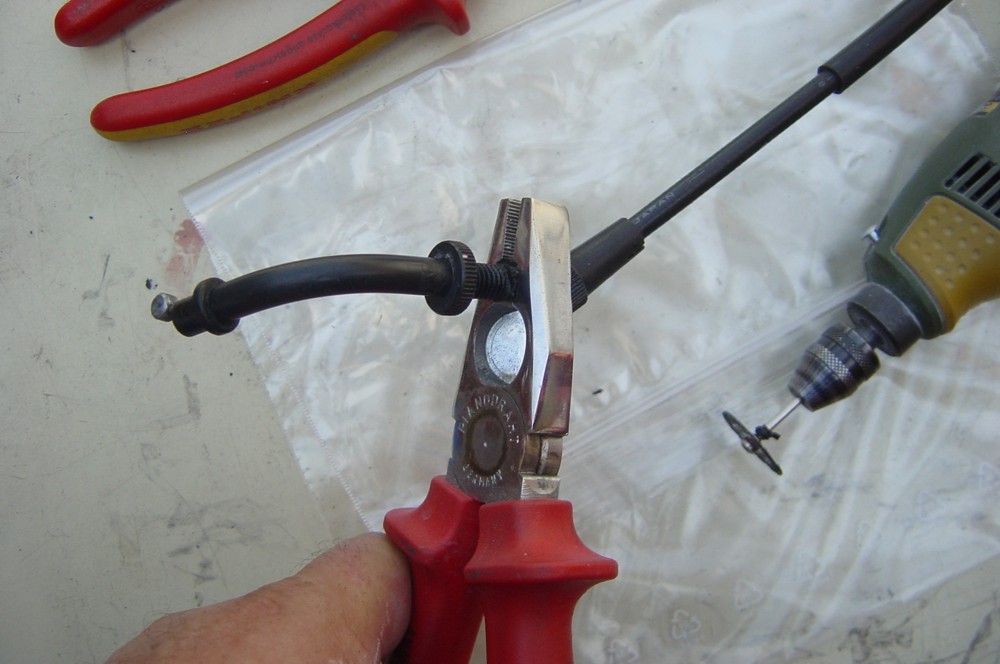
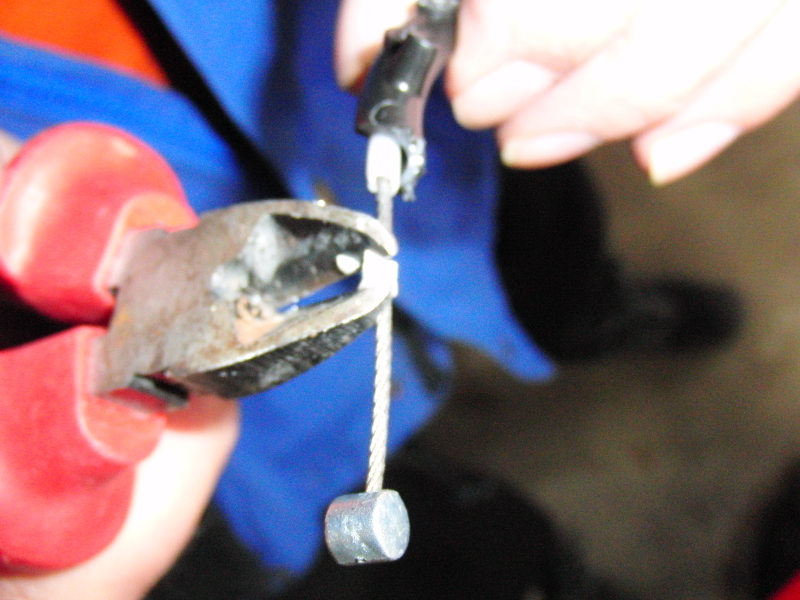
Besser geeignet ist eine Diamantschneidscheibe für den Dremel / Proxxon. Mit niedríger Drehzahl ringsrum in das Kunststoff eine Nut von 1 – 2 mm einschneiden, dann mit einer Flachzange dieses vordere Teil halten und drehen / brechen mit einem Seitenschneider das kleine Teil abzwicken.
A diamond cutting disc for the Dremel / Proxxon is
more suitable.
|
 |
 |
| Gleiches mit dem inneren Teil ( Gaszugseele ) Same with the inner part ( throttle cable core )
|
|
|
Mit einem Schleifer, Dremel / Proxxon, mit Frässtift oder Schleifscheibe die Anschläge im Gasgriffgehäuse um ca. 3 mm beidseitig abschleifen. Bitte darauf achten das es nur so viel wie nötig ist, so bleiben die Anschläge erhalten!
Using a grinder, Dremel / Proxxon, with a burr or grinding wheel, grind off the stops in the throttle body by approx. 3 mm on both sides. Please make sure that it is only as much as necessary, so that the stops remain intact!
|
 |
|
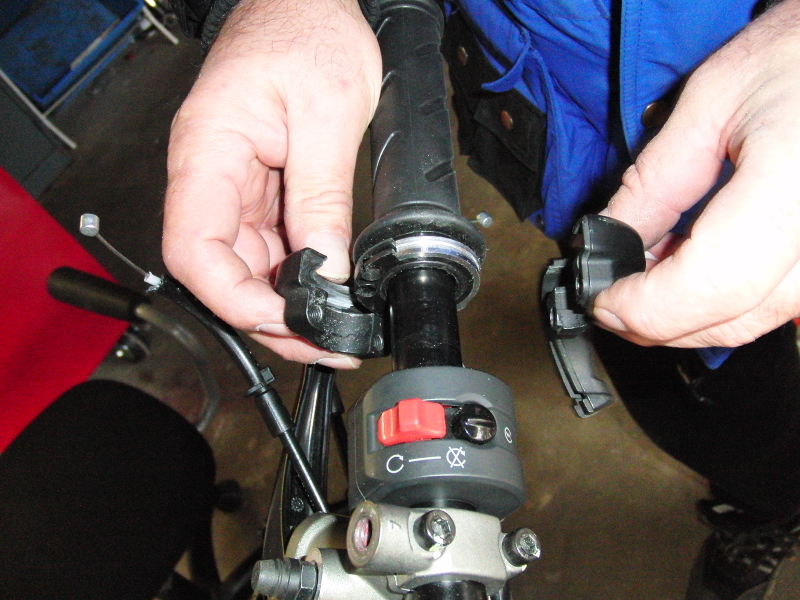
Zum Test ob es passt den Gasgriff samt Adapter auf den Lenkerschieben, die Griffschalen von Hand anpressen und den Griff vom vorderen Anschlag bis Vollgas drehen. Hier dürfen keine Widerstände, Kratz oder Schleifgeräusche auftreten, dann passt es.
To test
whether it fits, slide the throttle grip and adapter onto the handlebars,
press the grip shells
|
 |
 |
 |
|
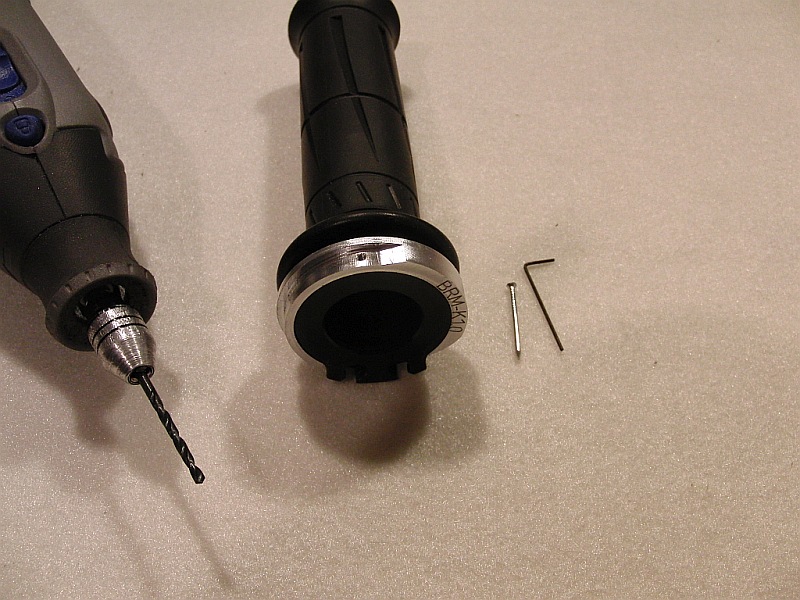
Montieren sie den KHG Adapter, die dicke Seite (Zug) oben. Die Adapter lassen sich mit leichter Spannung einfach montieren. Adapter auf den Gasgriff montieren, Gaszugöffner ist die höhere Seite, immer oben. Vorsicht, den Adapter nicht verbiegen !
Mount the KHG adapter, the
thick side (pull) on top.
|
 |
|
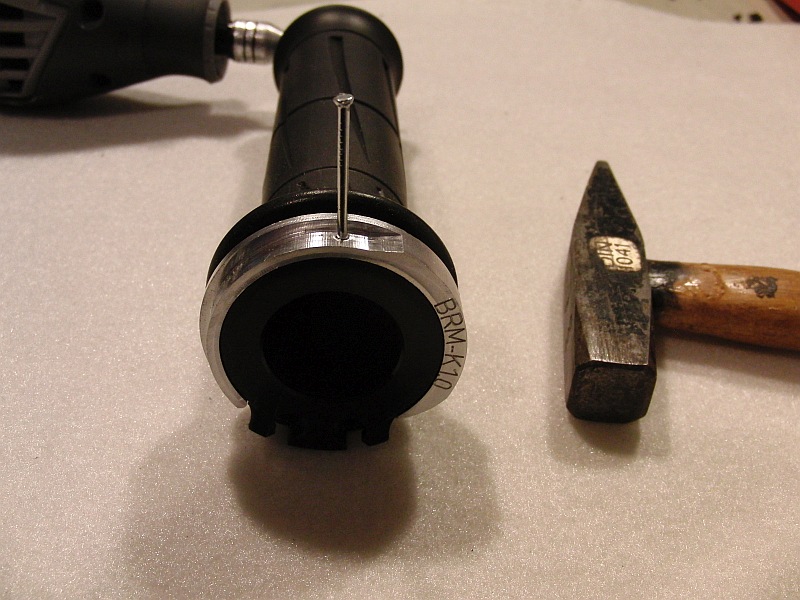
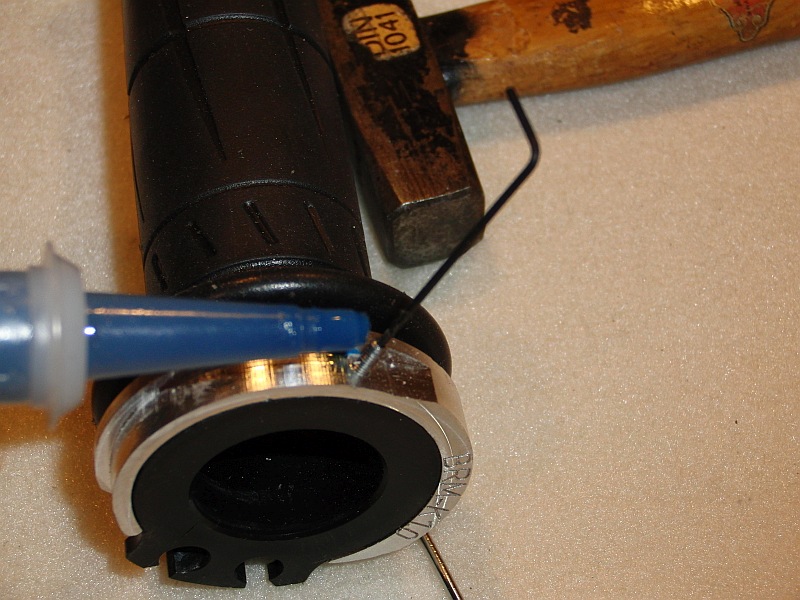
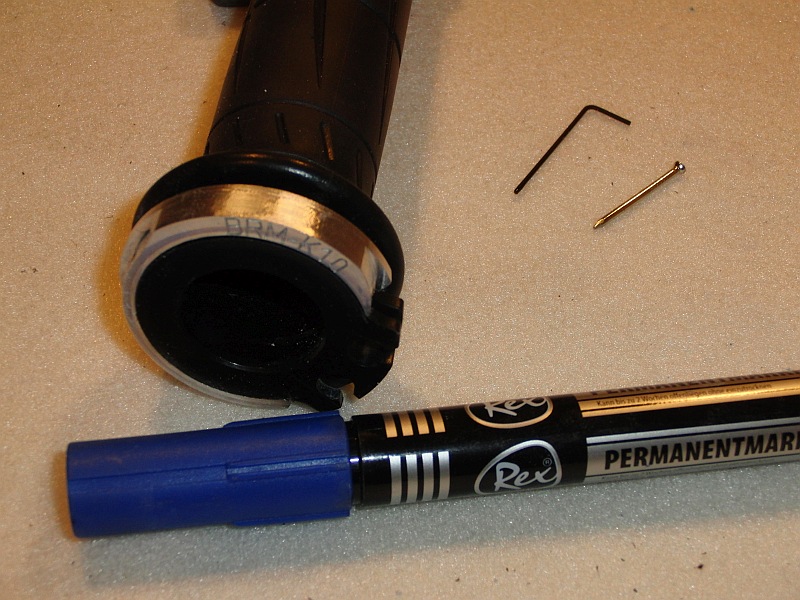
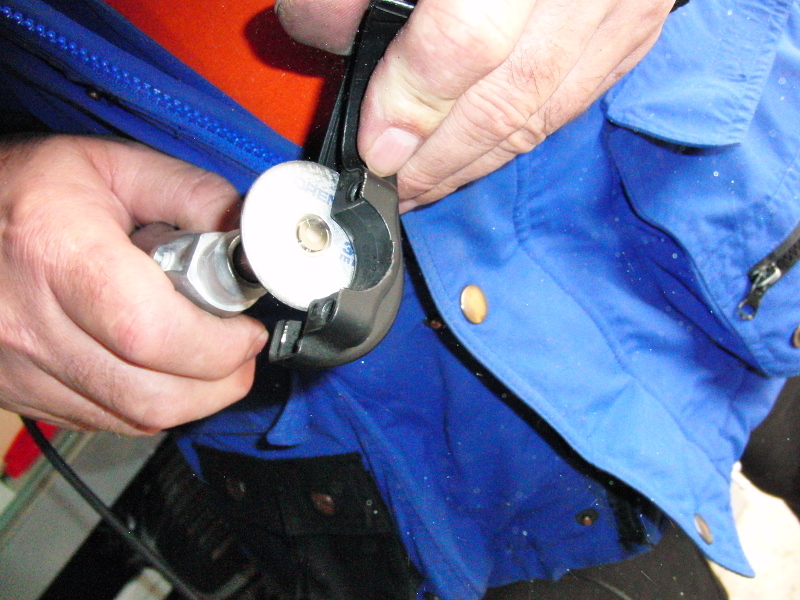
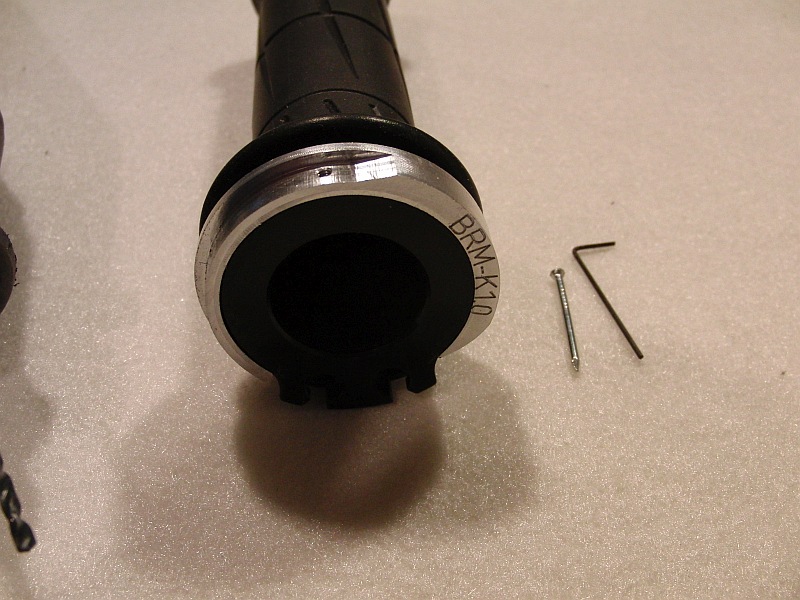
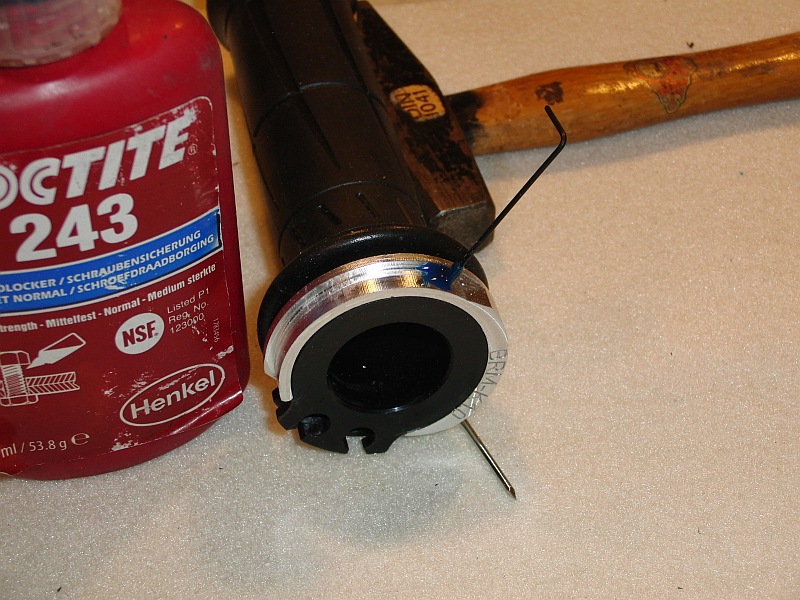
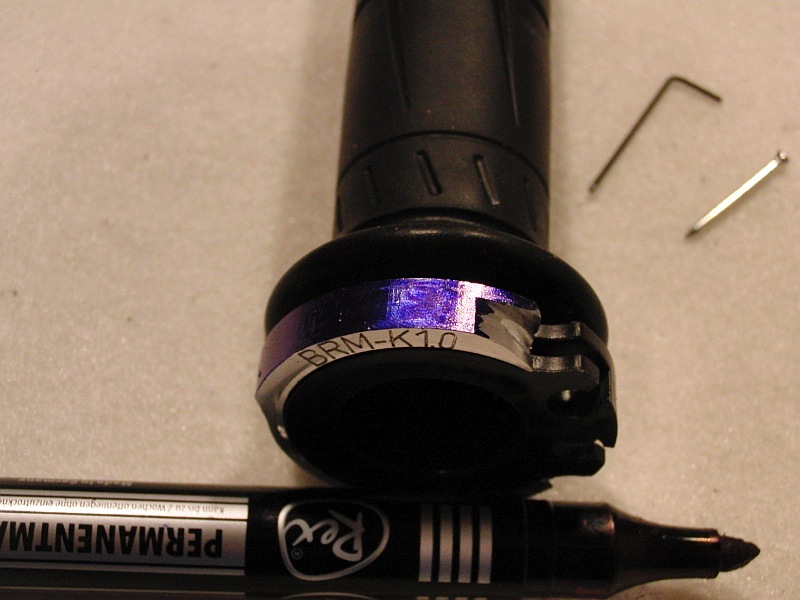
Den beigelegten Nagel 1,5 mm oder 1,8 mm in die Gewindebohrung M 2 oder M 2,5 mittig einführen und mit einem kleinen Hammer oben auf den Nagel schlagen so das eine Bohrmarkierung im Gasgriff deutlich zu sehen ist. Darauf achten das der Adapter exakt mittig auf den Gasgriff sitzt. Der Adapter kann dazu mit Klebeband fixiert werden.
Insert the enclosed 1.5 mm or
1.8 mm nail into the threaded hole M 2 or M 2.5 in the middle. |
 |
|
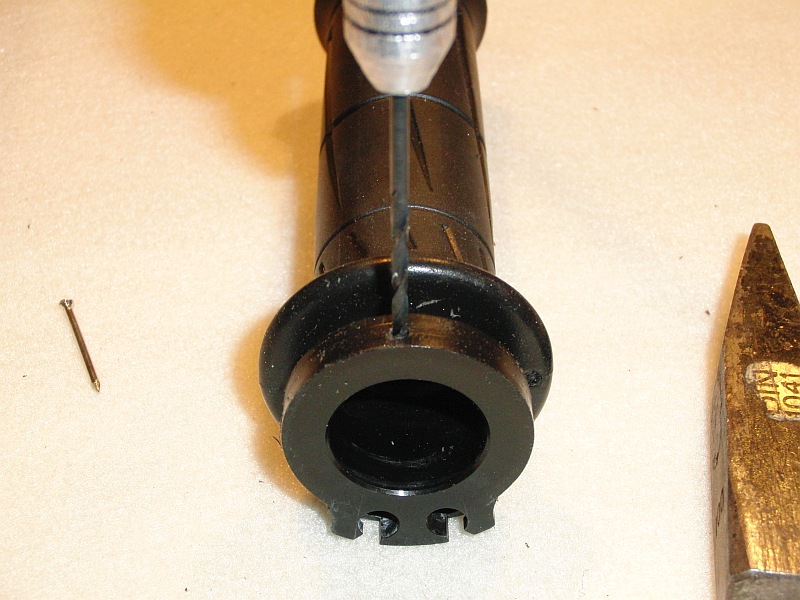
Den beigelegten Nagel 1,5 mm oder 1,8 mm in die Gewindebohrung M 2 oder M 2,5 mittig einführen und mit einem kleinen Hammer oben auf den Nagel schlagen so das eine Bohrmarkierung im Gasgriff deutlich zu sehen ist. Darauf achten das der Adapter exakt mittig auf den Gasgriff sitzt. Der Adapter kann dazu mit Klebeband fixiert werden.
Insert the enclosed 1.5 mm or
1.8 mm nail into the threaded hole M 2 or M 2.5 in the middle.
|
|
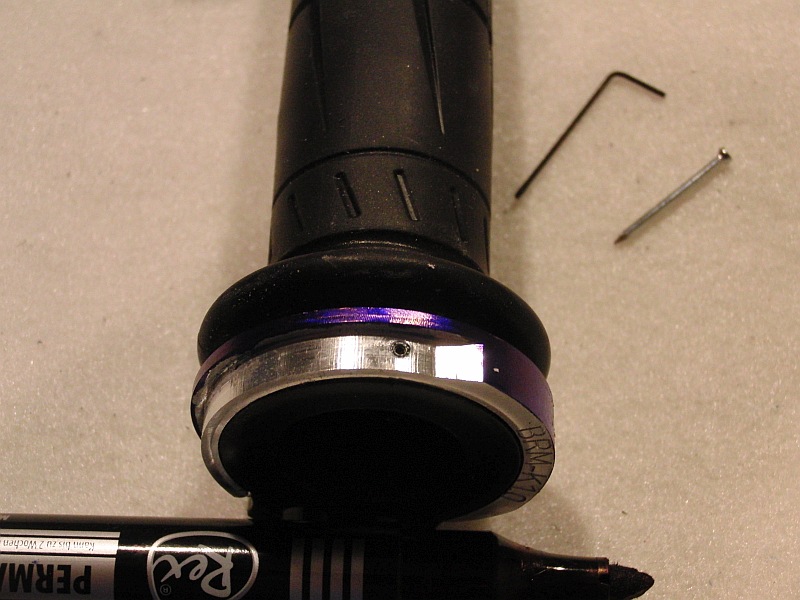
Den Adapter vorsichtig gleichmäßig abnehmen ohne ihn zu verbiegen. Mit beigefügtem Bohrer 2,4 mm oder 3,0 mm an der Markierten Stelle ein Durchgangsloch bohren.
Carefully and evenly remove
the adapter without bending it.
|
Die beiliegende Madenschraube ca. 2 Umdrehungen einschrauben. Das Gewinde mit muß Loktide Schraubensicherung beträufeln, die Schraube eindrehen bis der sie eben ( Plan ) mit dem Adapter ist.
Screw in the enclosed grub
screw approx. 2 turns.
|
 |
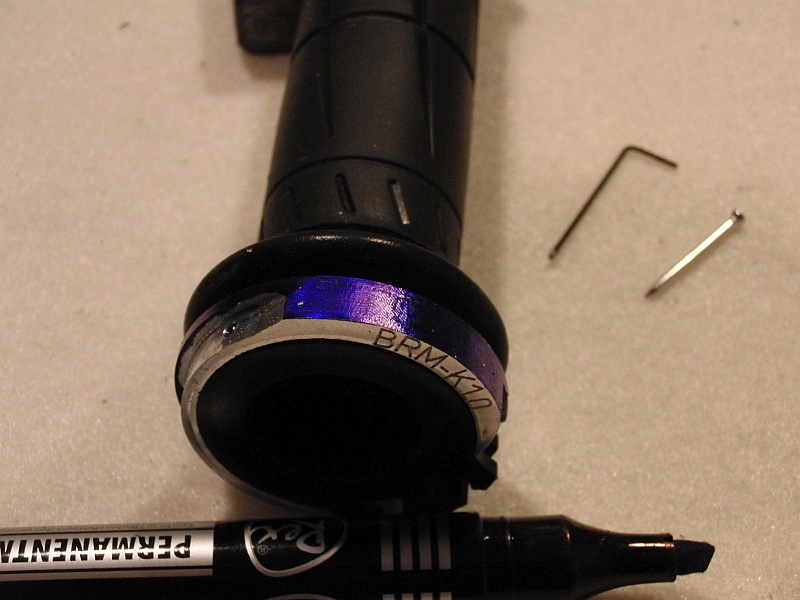
| Den Adapter auf den hohen Flächen mit einem Maker / Edding
/ Filsstift komplett anmalen. Completely paint the adapter on the high surfaces with a Maker / Edding / Filsstift.
|
 |
 |
 |
|
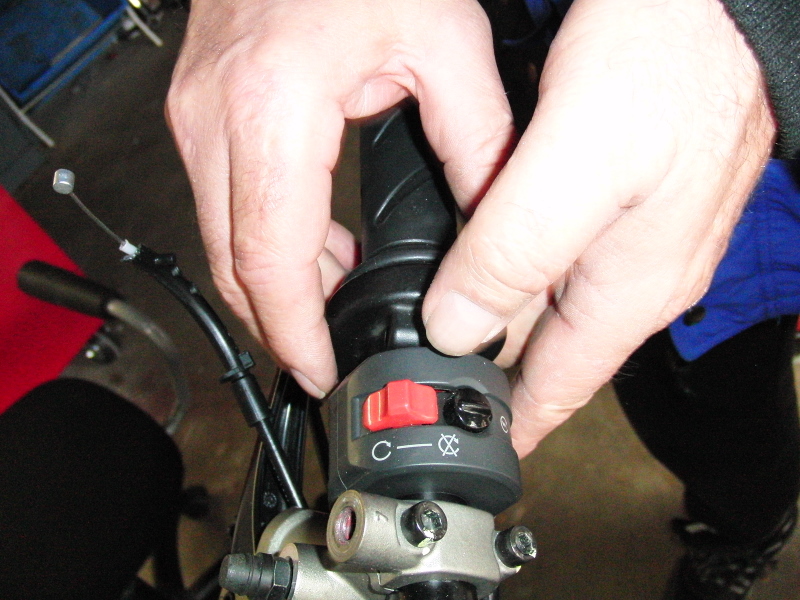
Gaszüge in den Gasgriff mit montiertem Adapter einlegen, Griffschalen drüberstecken und anschrauben. Achtung die untere Griffschale hat eine Fixierung mit Gegenstück ( Bohrung ) am Lenker, bitte richtig einstecken.
Anschließend die Gaszüge richtig einstellen. Als erstes den Gaszug ( öffnen ) hierzu die Stellschraube so weit drehen bis der Gasgriff am vorderen Anschlag anliegt, dann 2 bis 3 Umdrehungen öffnen.
Nun den Rückholgaszug ( schließen ) einstellen, so das zum Schuss ca. 2 – 4 mm Leerspiel am Gasgriff gemessen übrig sind.
Testen Sie bitte mehrfach ob der Gasgriff sich frei und ohne Widerstand öffnen und schießen lässt. Nun den Scheinwerfer montieren, fertig.
Insert
the throttle cables into the throttle grip with the adapter fitted, push
the grip shells over and screw on. when
firing are left.
|
|
Testen sie den Gasgriff auf absolute Freigängigkeit. Der Gasgriff muß aus jeder Position von selbst in Nullstellung zurücklaufen.
Test the throttle grip for
absolute freedom of movement. |
|
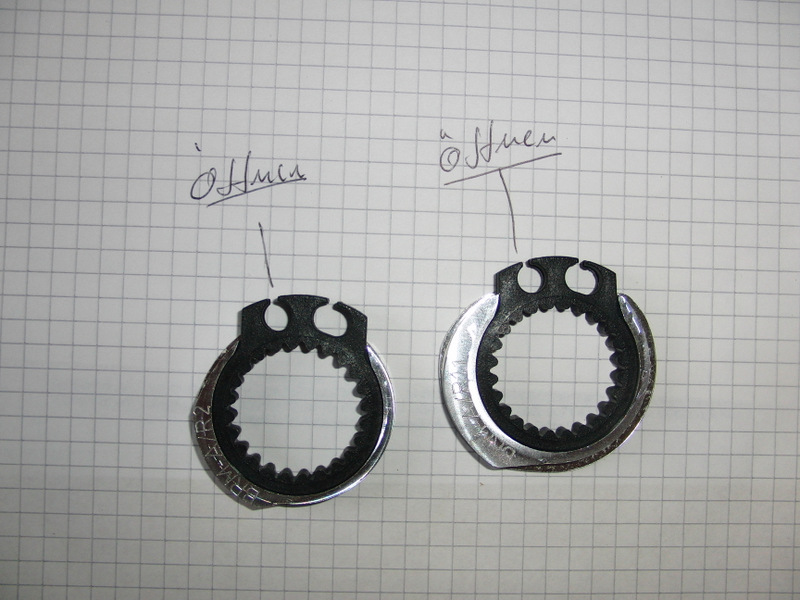
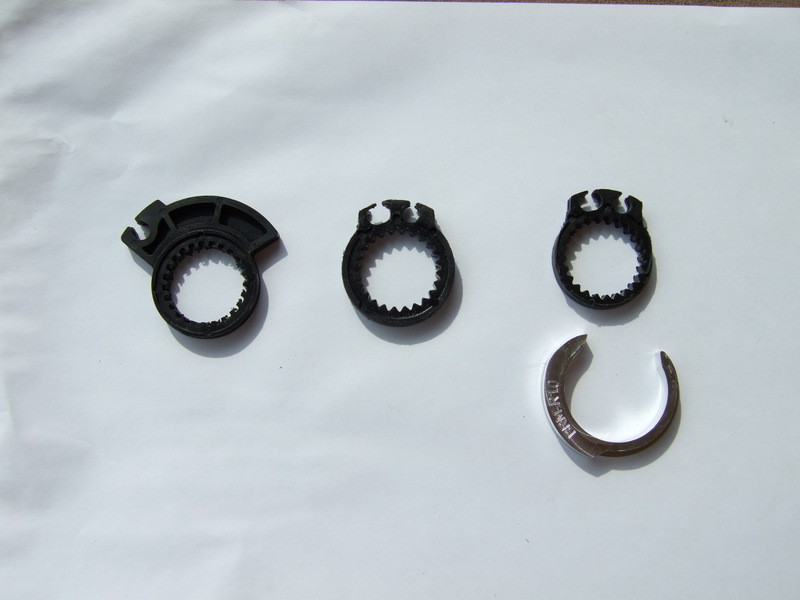
Dieser Hinweis ist nur bei Verwendung von Zubehörgriffen zu beachten! Bei Verwendung von ABM oder von Rizoma Griffen verwenden Sie bitte den von den Herstellern mitgelieferten kleinsten Ring. Sie können diesen auch bei uns beziehen , Preis 10,00 €.
This
note is only to be observed when using accessory grips!
|
| ACHTUNG GEFAHRENHINWEIS ! |
|
Durch unseren KHG Adapter verkürzt sich der Gasweg um ca. 25 % gegenüber der Serie. Vollgas aus dem Handgelenk ohne Nachfassen ist problemlos möglich. Das Motorrad reagiert auf jede Gasgriffbewegung wesentlich spontaner als mit dem Seriengasgriff. Fahren sie im eigenen Interesse mit der gebotenen Vorsicht bis sie sich an die neuen Umstände gewöhnt haben. Die Eingewöhnungszeit ist laut unserer Kundenaussagen meist nach 20 - 50 Km erledigt.
|
|
ATTENTION HAZARD WARNING ! Our KHG adapter shortens the throttle travel by approx. 25 % compared to the series. Full throttle from the wrist is possible without any problems. The motorbike reacts much more spontaneously to every movement of the throttle grip than with the standard throttle grip. In your own interest, ride with due caution until you have become accustomed to the new conditions. According to our customers, the acclimatisation period is usually over after 20 - 50 km. |