Schwabenmax® Serviceseiten
|
Schwabenmax® Serviceseiten
|
| Einbauanleitung Kurzhubgasgriff für MV Agusta
und Aprilia Modelle Gehen Sie bitte genau nach dieser Einbauanleitung vor. Verwenden Sie nur von uns angelieferte Teile, Gasgriffklammer Nach beendeter Montage testen Sie bitte die Freigängigkeit des Gaszugs / Griff. Dieser muß von alleine in die Ausgangsposition zurückdrehen. Der Gasgriff muss nach der Montage freibeweglich sein. Es darf kein Kratzen oder Schleifen auftreten.
Hinweis: Unsere Adapter sind absolut passgenau. Der gelieferte Adapter muss ohne Gewaltanwendungen eingefügt werden können. Sollte Sie einen Adapter geliefert bekommen, der nicht passgenau ist, bitte nichts daran ändern verbiegen oder bearbeiten sondern verständigen Sie uns schnellstmöglich.
Gefahrenhinweis: das Fahrzeug spontaner auf Gasgriffbewegungen reagiert. Fahren Sie mit gebotener Vorsicht bis Sie sich an die neuen Umstände gewöhnt haben! Sollten sie Fragen oder Probleme beim Einbau haben kontaktieren sie uns bitte unter: E Mail : KHG-Einbaufragen
|
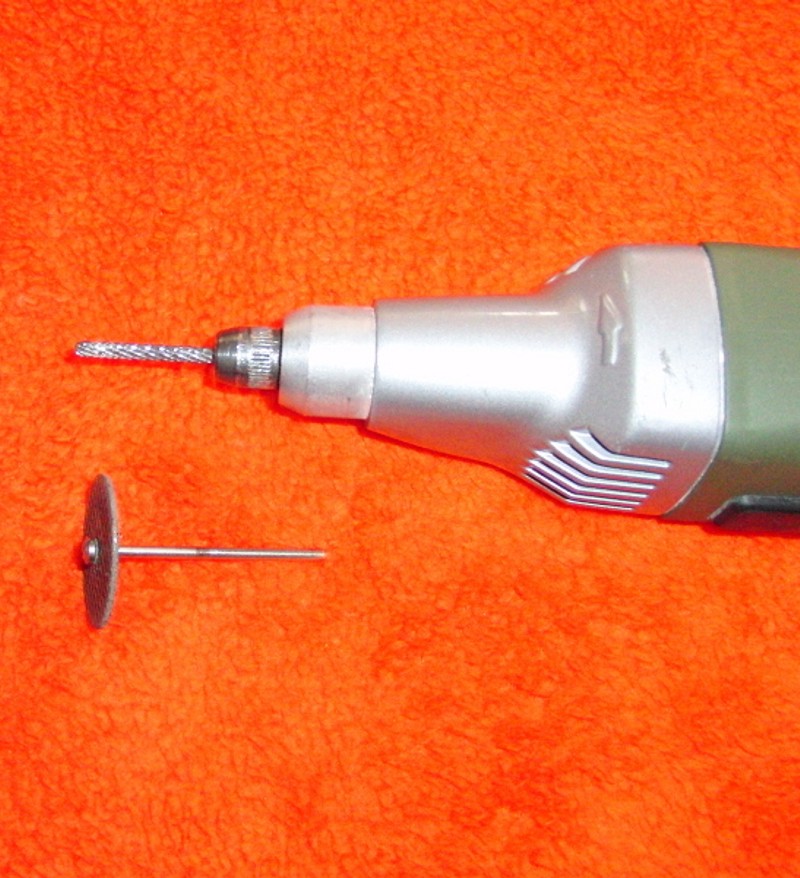
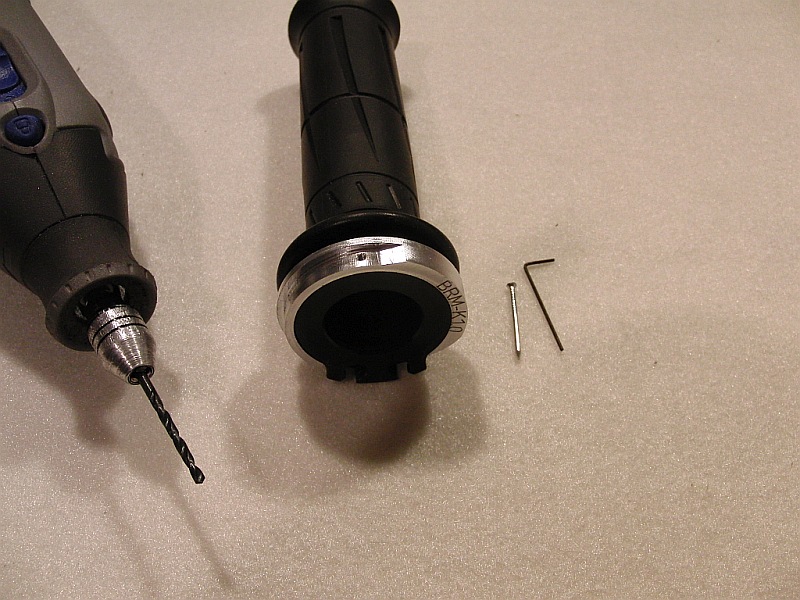
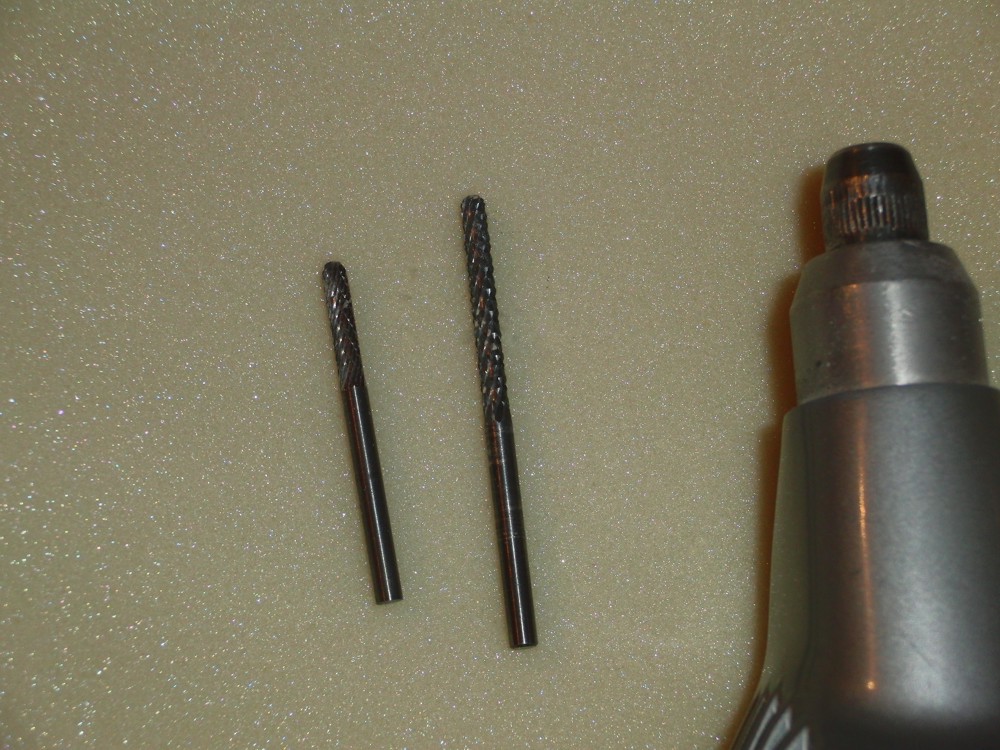
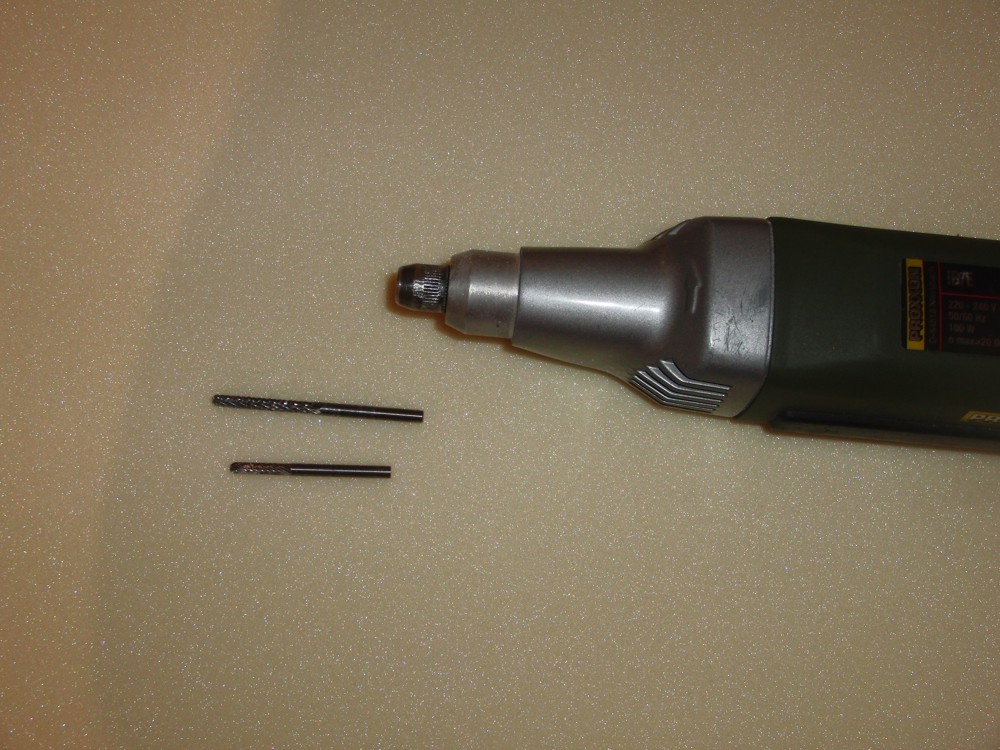
| Montageanleitung: Stellen sie ihr Fahrzeug sicher auf dem Seiten - oder Hauptständer auf . Zur passenden Bearbeitung des Gasgriffgehäuses benötigen sie ein Schleifwerkzeug wie einen Dremel, Proxon , oder ähnliches. Weiterhin wird benötigt: 1 Frässtift
Assembly instructions:
|
 |
 |
|
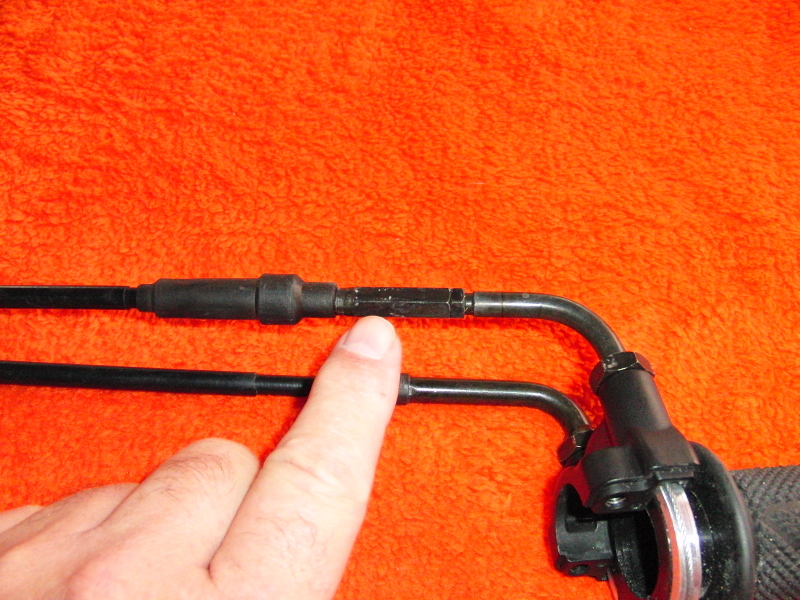
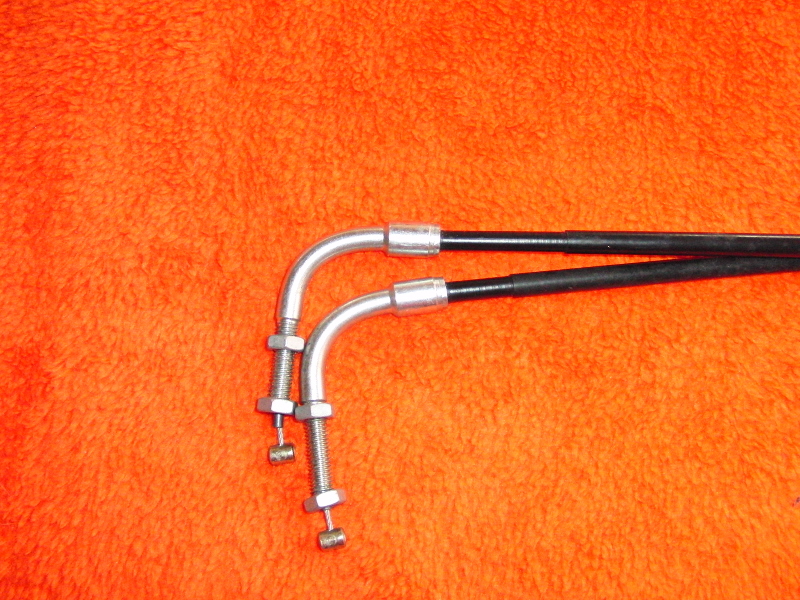
Gaszüge an der Einstellschraube maximal eindrehen. Screw in the throttle cables to the maximum at the adjusting screw.
|
|
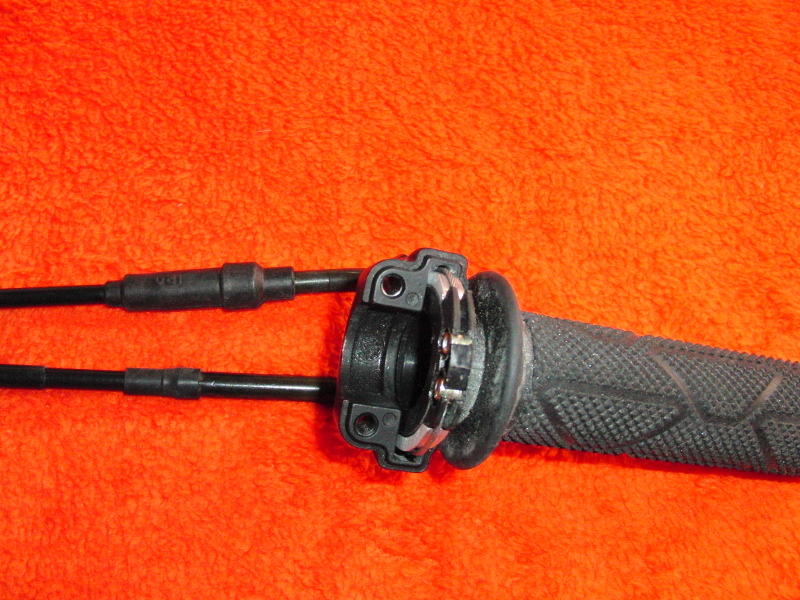
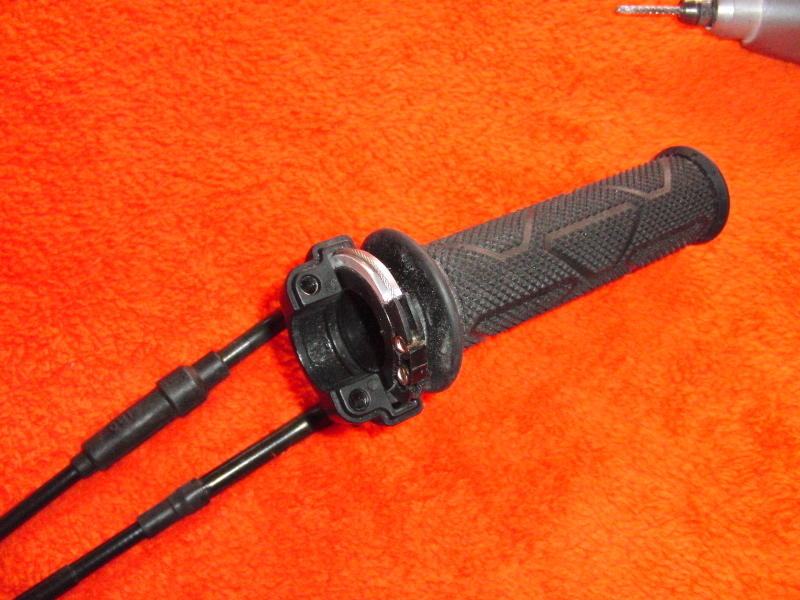
Gasgriff an den beiden Halteschrauben
komplett aufschrauben / lösen.
Gaszüge ausbauen, Griffschalen abnehmen.
Es muss nicht zwingend der Gaszug (
öffnen ) oben ausgebaut werden, wenn Sie
vorsichtig hantieren genügt es den Gaszug
mit den Fingern etwas zur Seite zu drücke
|
 |
|
 |
|
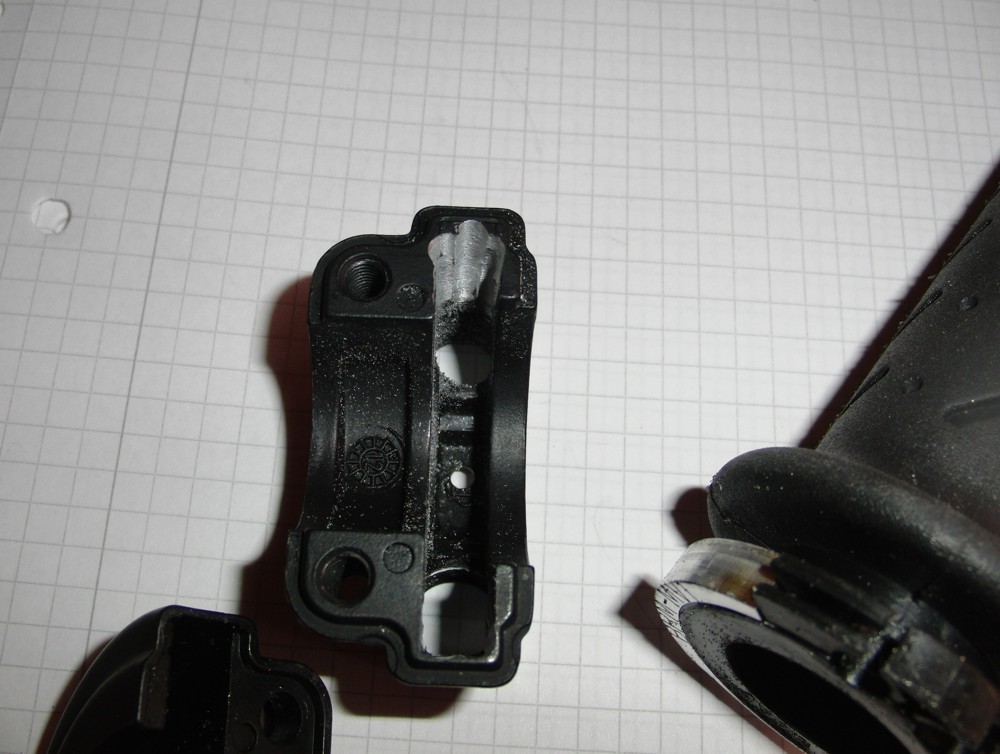
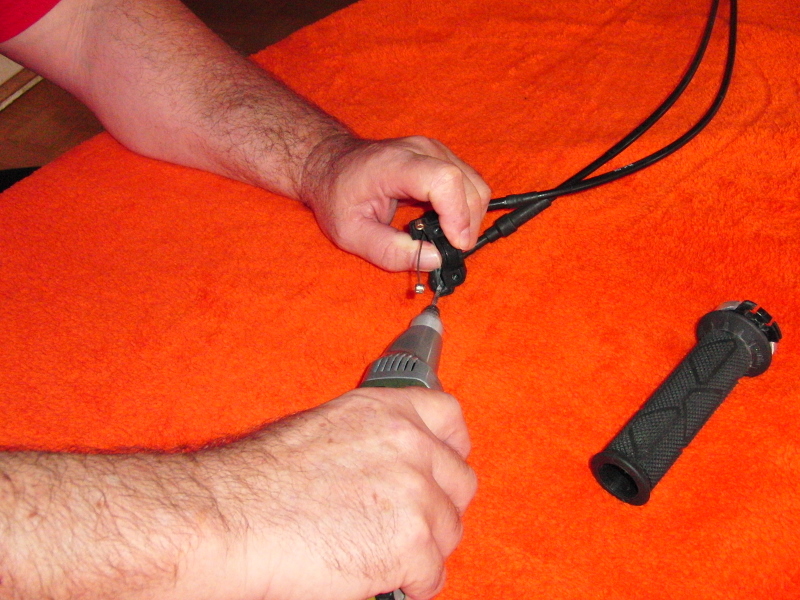
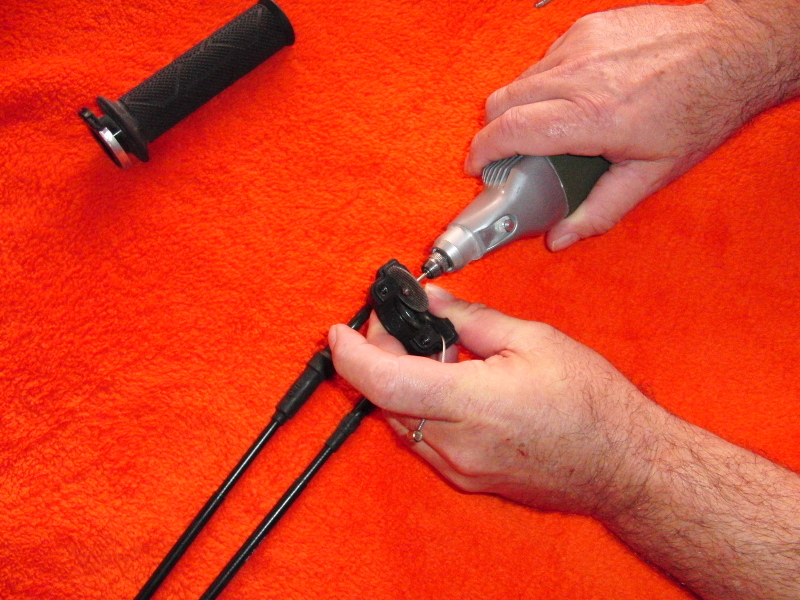
Obere Gasgriffgehäuse an den Anschlägen des
Gasgriffs um ca. 2 –2,5 mm abfräsen / schleifen.
Es muss lediglich soviel abgeschliffen
werden das der Gasgriff mit montiertem
Adapter sich frei drehen lässt, ohne
das Griffgehäuse an dieser Stelle zu berühren.
Zum fräsen / schleifen stellen Sie die
Maschine am Anfang auf niedrige Drehzahl ein
Hinweis, wir bieten an ,diese Fräsarbeiten gegen 10.- Euro Bearbeitungskosten zu
übernehmen. Hierzu senden Sie uns bitte
nach vorheriger “ Absprache “ Ihren Gasgriff
und beide Griffschalen zu.
Mill off / grind the upper throttle grip
housings at the stops of the throttle grip by approx. 2 -2.5 mm.
Griffgehäuse Aluminium aufräsen.
Bei Alumium Griffgehäusen sind innen links und rechts sogenannte Null
Anschläge eingegossen.
Bei geschlossenem Gas schlägt der Griff an dieser Postition an.
Die Anschläge müssen Analog zur Höhe des Adapter von oben her bis zur
jeweiligen Innenkannte abgeschliffen werden.
Die Regel ist so, ist dar Adapter 4 mm hoch werden 2,5 bis 3 mm
gleichmäßig abgeschliffen, also in Mittel ca. 1 bis 1,5 mm
weniger als der Adapter maximal hoch ist.
Im Normalfall reicht es so aus.
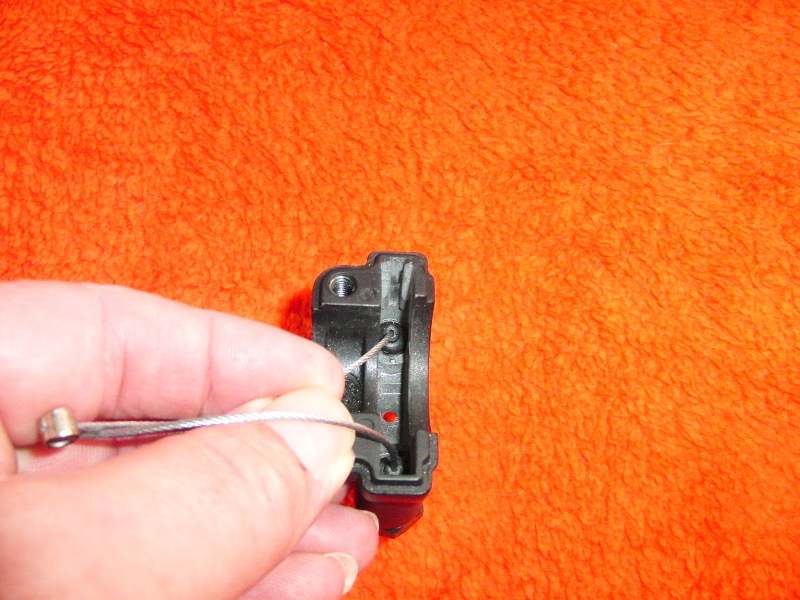
Griffgehäuse / Schaltereinheit Plastik
Die Plastikgehäuse sind in der Regel innen über 2 – 3 cm als
Nullanschlag dicker ausgelegt.
Das heißt über die komplett länge muß das Plastik abgeschliffen werden.
Speziell ist darauf zu achten das im Bereich der Gaszugführung nach
Links und Rechts gerade abgeschliffen wird.
Die Anschläge müssen Analog zur Höhe des Adapter von oben her bis zur
jeweiligen Innenkannte abgeschliffen werden.
Die Regel ist so, ist dar Adapter 4 mm hoch werden 2,5 bis 3 mm
gleichmäßig abgeschliffen, also in Mittel ca. 1 bis 1,5 mm
weniger als der Adapter maximal hoch ist.
Im Normalfall reicht es so aus.
Roughen aluminium handle
housing.
Test. Den Gasgriff mit montiertem Adapter auf den Lenker stecken. Das untere Griffgehäuse ( Gaszugeingang ) und das bearbeitete Griffgehäuse darüber stecken mit der Hand passend draufhalten. Den Gasgriff bitte langsam mit Feingefühl drehen, wenn es einen Widerstand gibt bzw. kratzt muss das Griffgehäuse noch etwas nachgearbeitet werden. Am Gasgriff bzw. der Farbmarkierung ist deutlich zu sehen wo es schleift. Den Vorgang so lange wiederholen bis der Griff in allen Varianten incl. das vorhandene Axialspiel nicht mehr schleift. Test.
|
|
Montieren sie den KHG Adapter, die dicke Seite (Zug) oben. Die Adapter lassen sich mit leichter Spannung einfach montieren. Adapter auf den Gasgriff montieren, Gaszugöffner ist die höhere Seite, immer oben. Vorsicht, den Adapter nicht verbiegen !
Mount the KHG adapter, the
thick side (pull) on top.
|
|
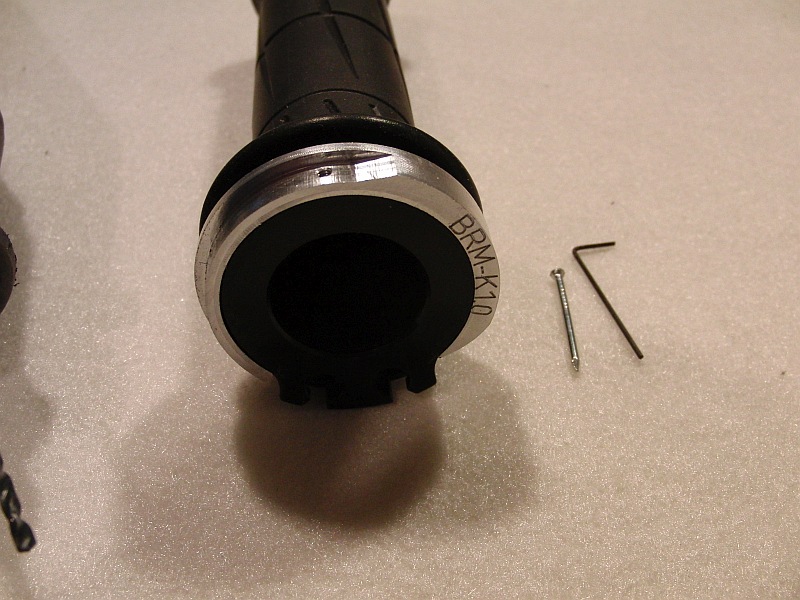
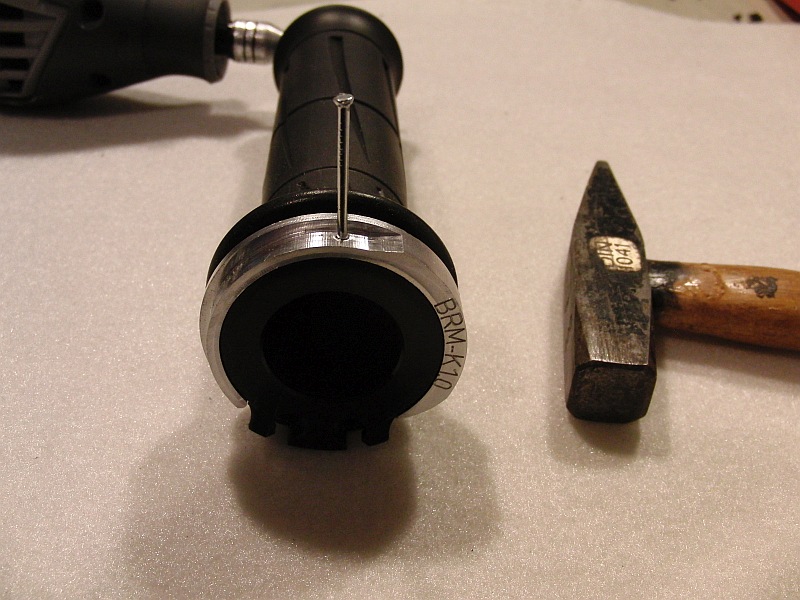
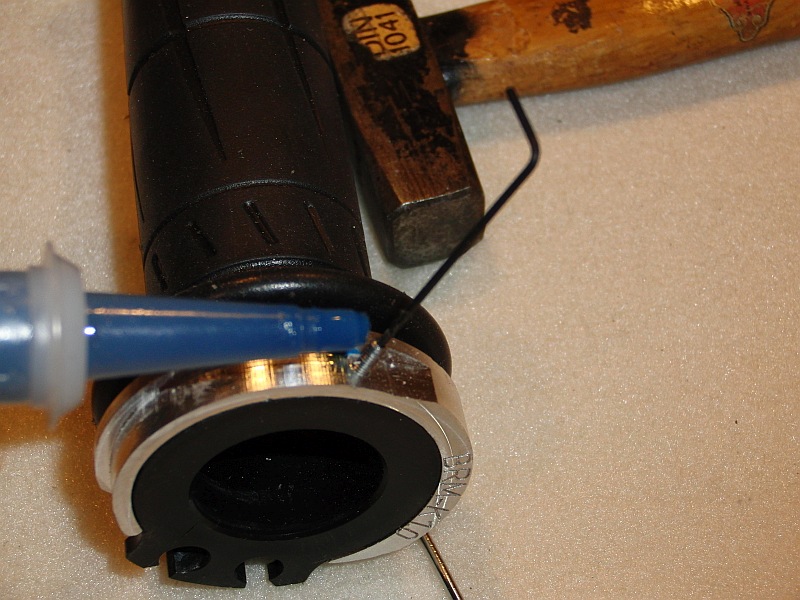
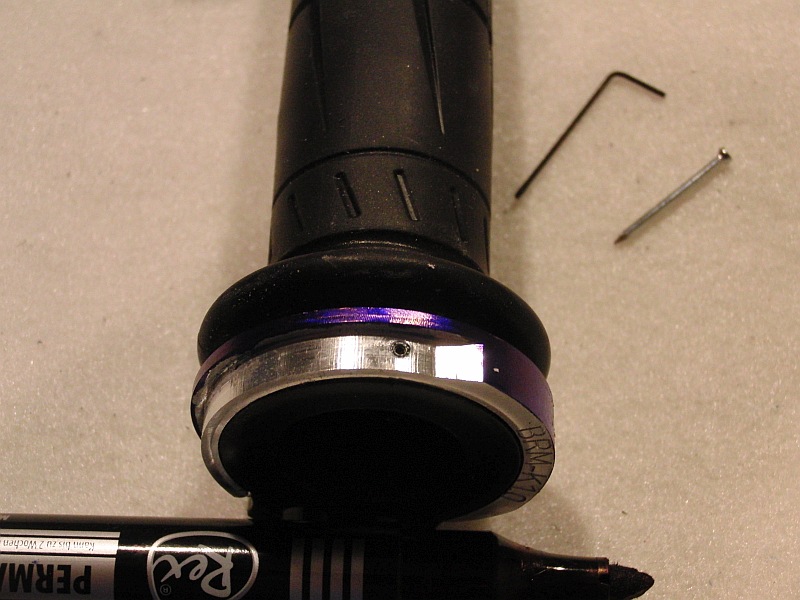
Den beigelegten Nagel 1,5 mm oder 1,8 mm in die Gewindebohrung M 2 oder M 2,5 mittig einführen und mit einem kleinen Hammer oben auf den Nagel schlagen so das eine Bohrmarkierung im Gasgriff deutlich zu sehen ist. Darauf achten das der Adapter exakt mittig auf den Gasgriff sitzt. Der Adapter kann dazu mit Klebeband fixiert werden.
Insert the enclosed 1.5 mm or
1.8 mm nail into the threaded hole M 2 or M 2.5 in the middle.
|
|
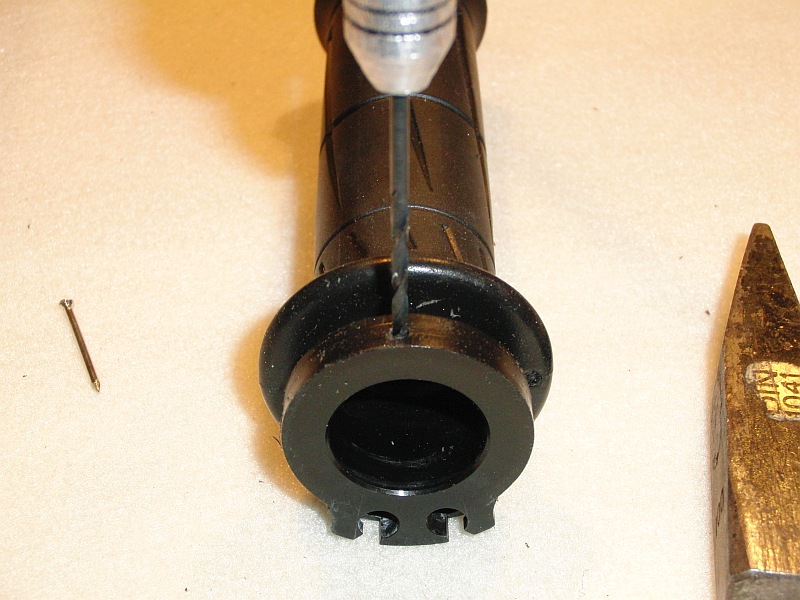
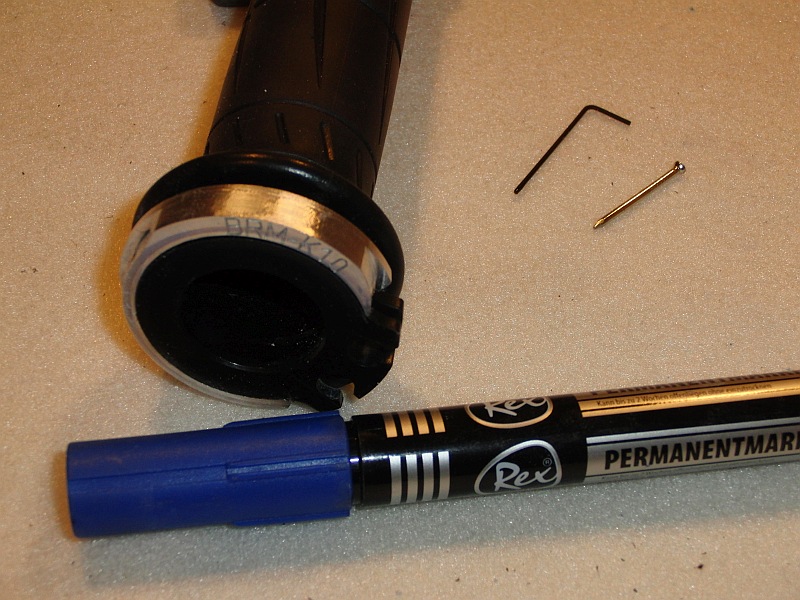
Den Adapter vorsichtig gleichmäßig abnehmen ohne ihn zu verbiegen. Mit beigefügtem Bohrer 2,4 mm oder 3,0 mm an der Markierten Stelle ein Durchgangsloch bohren.
Carefully and evenly remove
the adapter without bending it.
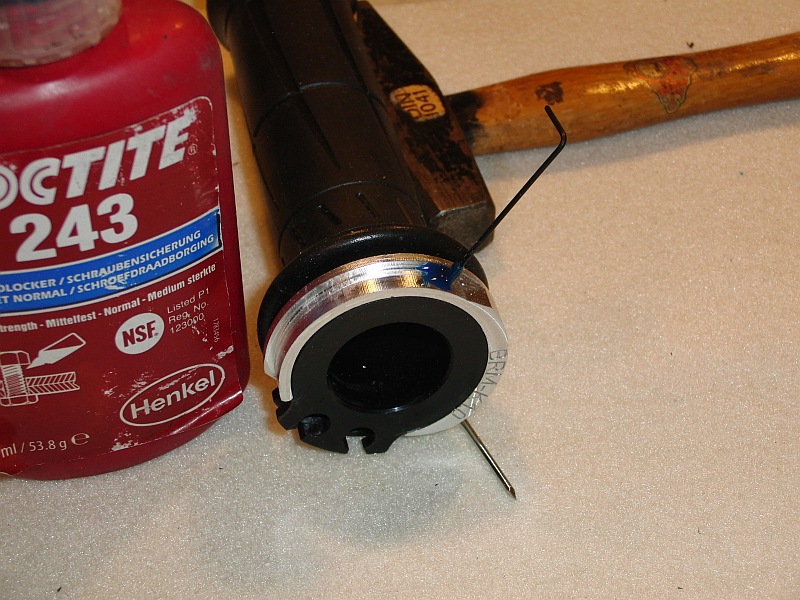
Die beiliegende Madenschraube ca. 2 Umdrehungen einschrauben. Das Gewinde mit muß Loktide Schraubensicherung beträufeln, die Schraube eindrehen bis der sie eben ( Plan ) mit dem Adapter ist.
Screw in the enclosed grub
screw approx. 2 turns.
|
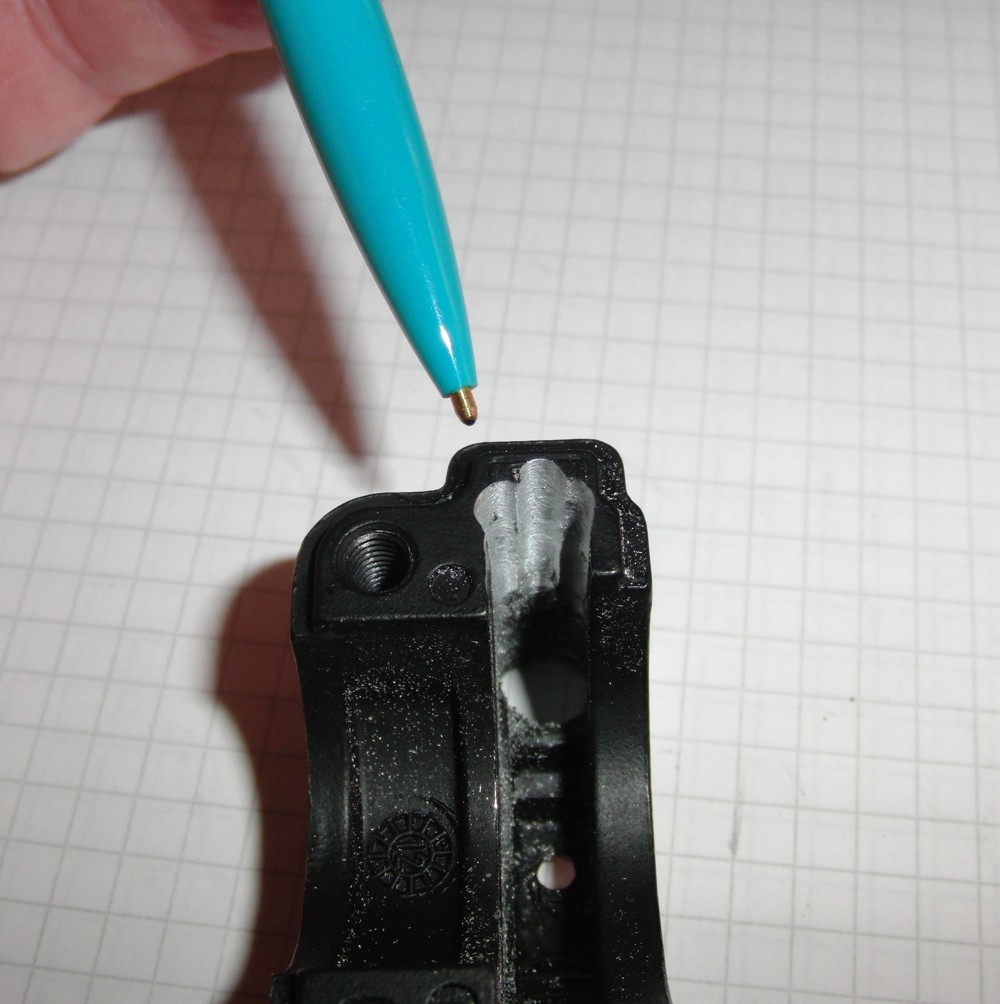
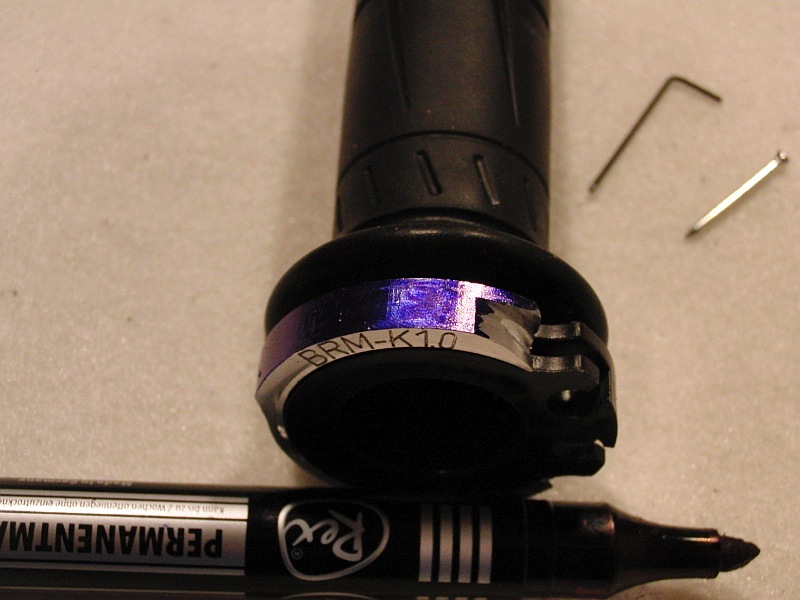
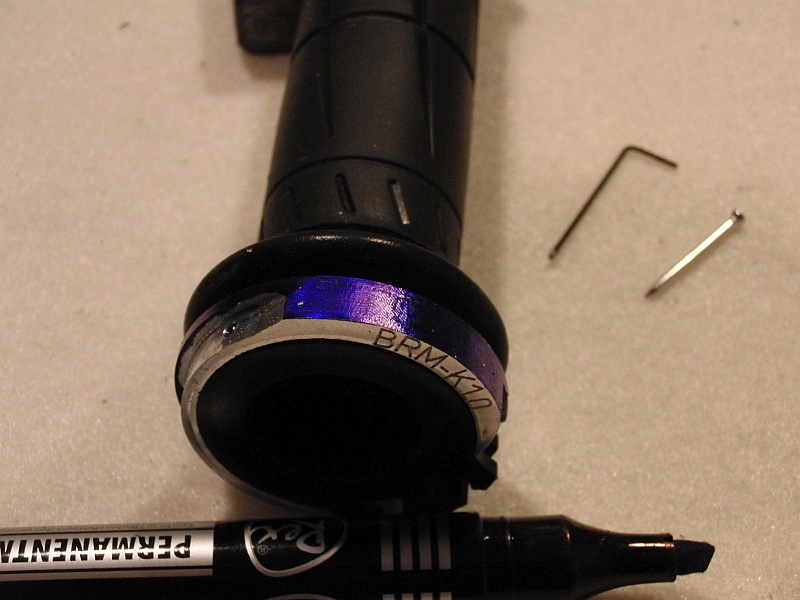
| Den Adapter auf den hohen Flächen mit einem Maker / Edding
/ Filsstift komplett anmalen. Completely paint the adapter on the high surfaces with a Maker / Edding / Filsstift.
|

|
|
Montieren Sie den Gasgriff mit eingelegtem
Adapter und Gaszüge am Lenker.
Stellen Sie die Gaszüge mittels der
Stellschraube so ein das ca. 3 – 4 mm Leerspiel
aussen am Gasgriff messbar sind
|
|
 |
|
|
|
In seltenen Fällen müssen die Gaszüge
direkt unten an der Einspritzanlage über die Stellschrauben
nachjustiert werden In rare cases, the throttle cables must
be connected directly to the bottom of the injection system via the
|
| Testen
sie den Gasgriff auf absolute Freigängigkeit. Der Gasgriff muß aus jeder Position von selbst in Nullstellung zurücklaufen Test the throttle grip for absolute freedom of
movement.
Warnhinweis: |
|
Durch unseren Kurzhubgas Adapter verkürzt sich der Gasweg um ca. 25% gegenüber der Serie. Vollgas aus dem Handgelenk ohne Nachfassen ist problemlos möglich. Das Motorrad reagiert auf jede Gasgriffbewegung wesentlich spontaner als mit dem Seriengasgriff. Fahren Sie im eigenen Interesse mit der gebotenen Vorsicht bis sie sich an die neuen Umstände gewöhnt haben. |
| Warning: Our short-stroke gas adapter shortens the gas path by approx. 25% compared to the series. Full throttle from the wrist is possible without any problems. The motorcycle reacts to every throttle grip movement much more spontaneously than with the standard throttle grip. Ride in your own interest with the necessary caution until you have got used to the new circumstances. Translated with www.DeepL.com/Translator |